Debugging Raspberry PI kernel module with VisualKernel
This tutorial shows how to debug a basic Linux kernel module on Raspberry PI over JTAG using Visual Studio. Before you begin, install VisualKernel 3.0 or later. Also ensure you have an extra x64-based Linux machine available (e.g. a stock Ubuntu VM) that will be used to build the Raspberry Pi kernel.
Update: Starting from VisualKernel 4.0, you can use pre-built Raspberry Pi kernel images and avoid building the kernel yourself. See this tutorial for more details.
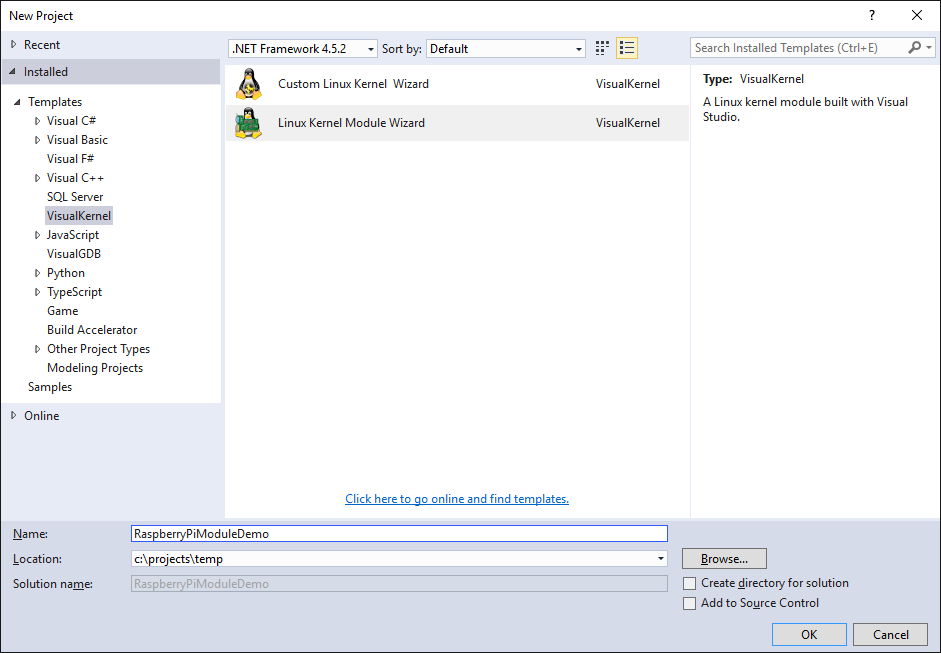
- Start Visual Studio. Select File->New->Project->VisualKernel->Linux Kernel Module Wizard:
- On the first page select Create a new kernel module -> Hello, World:

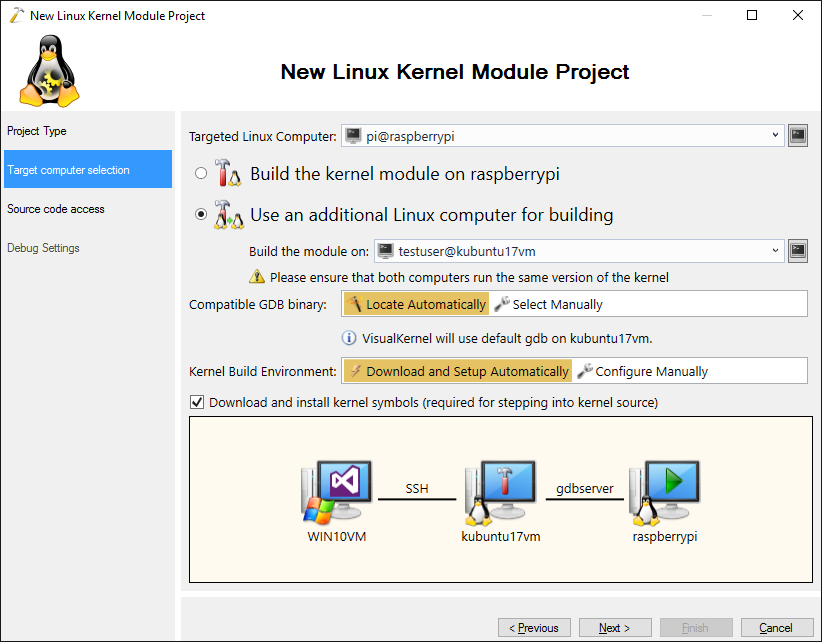
- On the Target selection page specify the following settings:
- Targeted Linux computer – your Raspberry PI
- Additional build computer – the x64 Linux machine that will run the build process
- Kernel build environment – Download and Setup Automatically
- Press “Next”. VisualKernel will ask for a directory on the build machine where the kernel symbols will be stored. Proceed with the default directory or select another one:

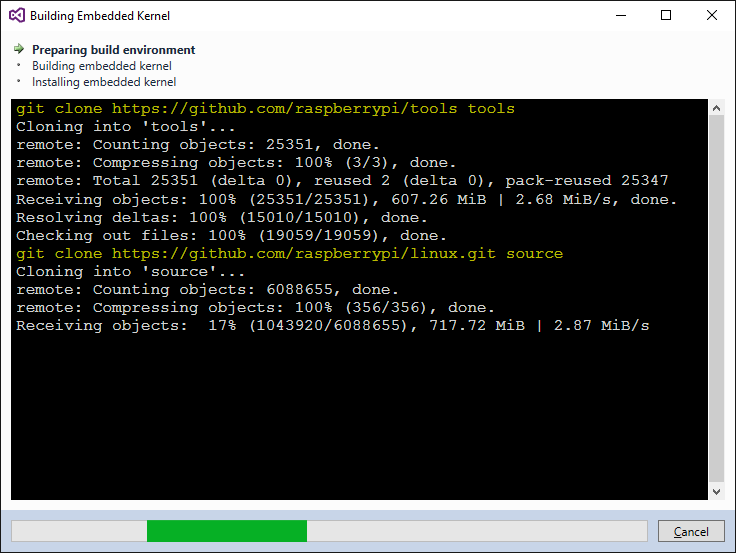
- VisualKernel will automatically download the Raspberry Pi cross-toolchain and the latest kernel sources. Then it will configure and build the kernel using the cross-toolchain:
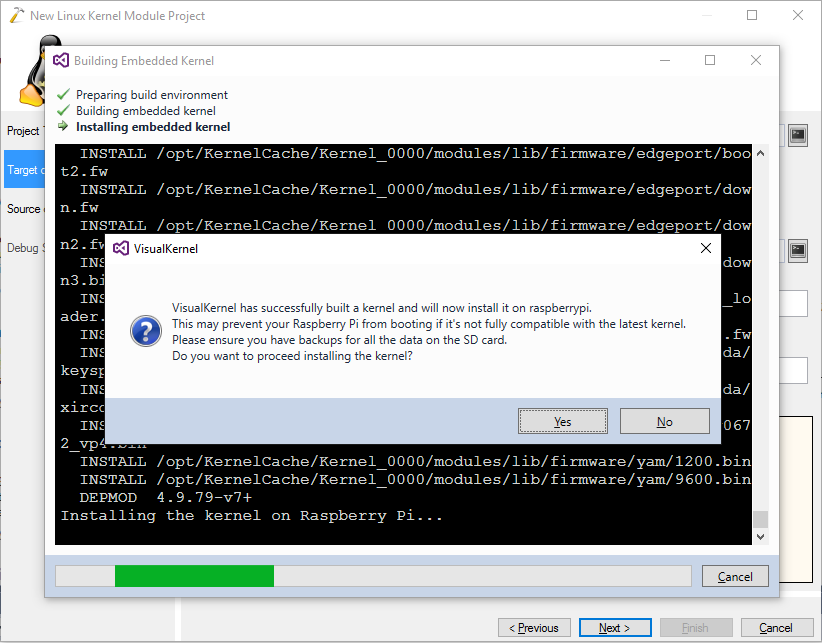
- Once the build is complete, VisualKernel will suggest automatically installing the kernel on Raspberry Pi. Ensure you have a backup of your SD card contents and press “Yes”:
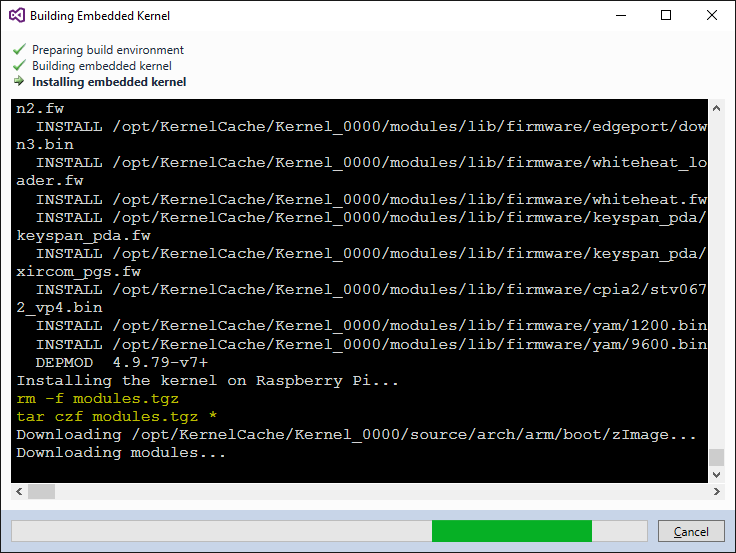
- VisualKernel will automatically install both the kernel and the related modules:
- Once the installation is complete, restart your Raspberry Pi and press “OK” to automatically verify that the new kernel has started:

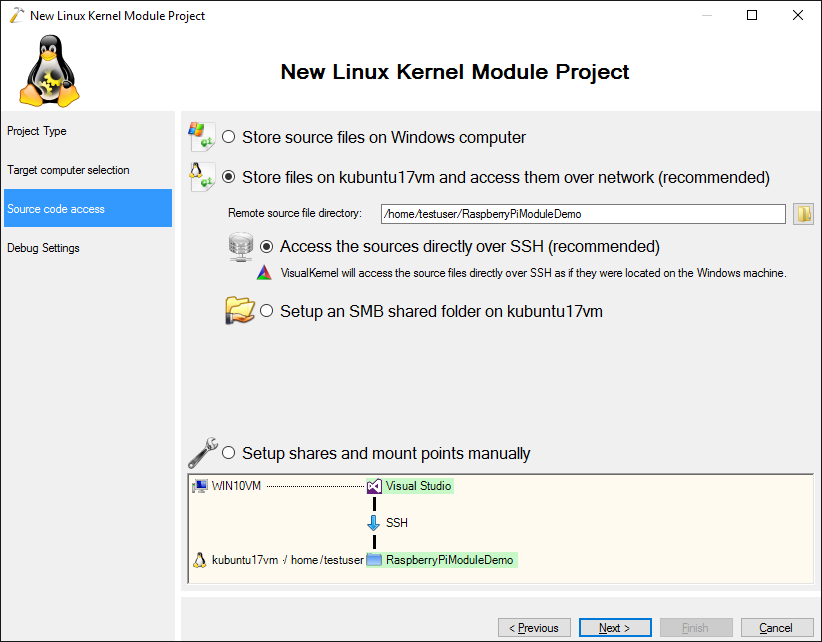
- VisualKernel will proceed to the next page of the wizard. As you are using an extra Linux machine for building the sources, VisualKernel can access the source code directly via SSH and won’t need to keep 2 separate copies of the sources or synchronize include directories. Select “Access the sources over SSH” to enable this mode. If you want to keep a copy of the sources on the Windows machine, select “Store source files on Windows computer” instead:
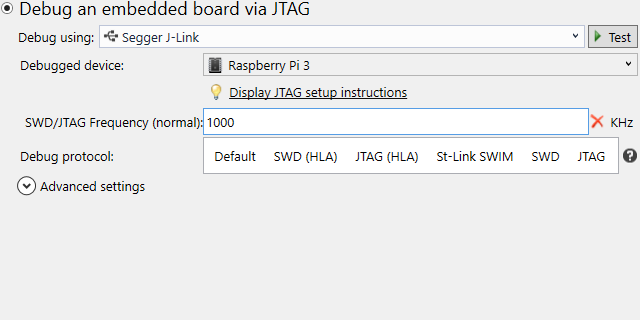
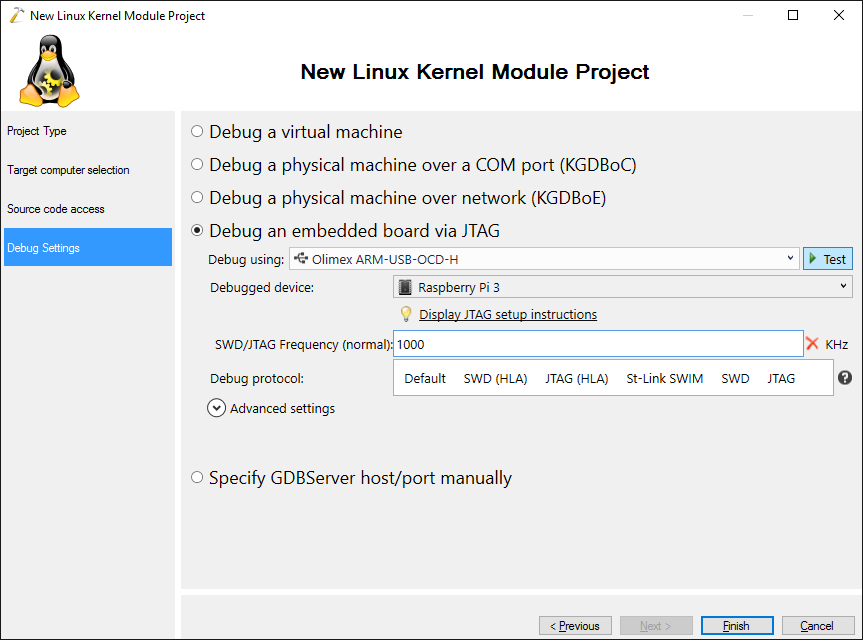
- On the Debug Settings page select “Debug an embedded board via JTAG”. Then plug in your JTAG debugger, connect it to Raspberry Pi as described in this tutorial and pick your Raspberry Pi version in the “Debugged device” field. Then press “Test” to test the connection:
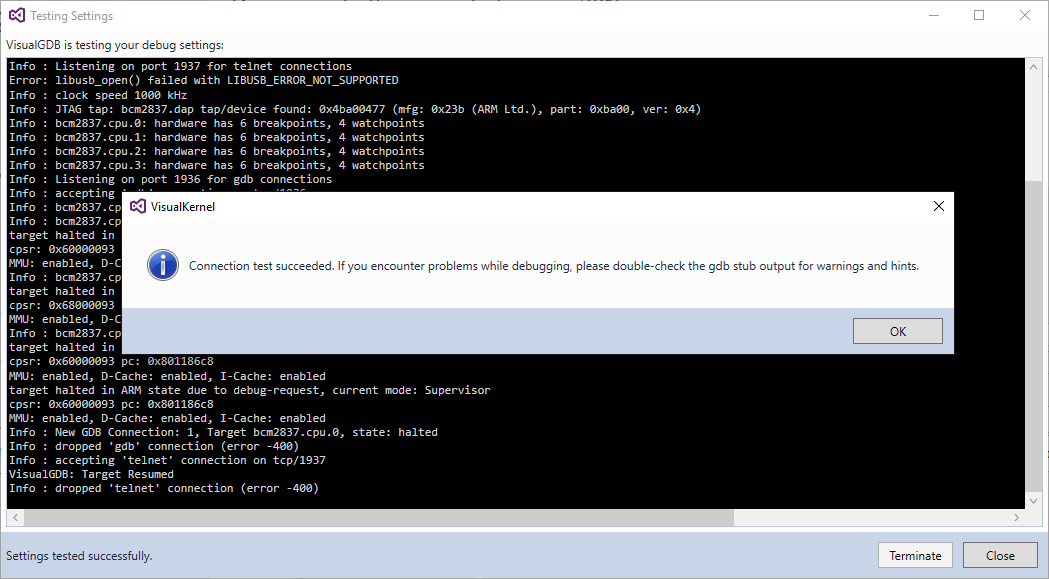
- VisualKernel will automatically configure Raspberry Pi to use the JTAG pins described in the JTAG tutorial and test that it can be debugged:
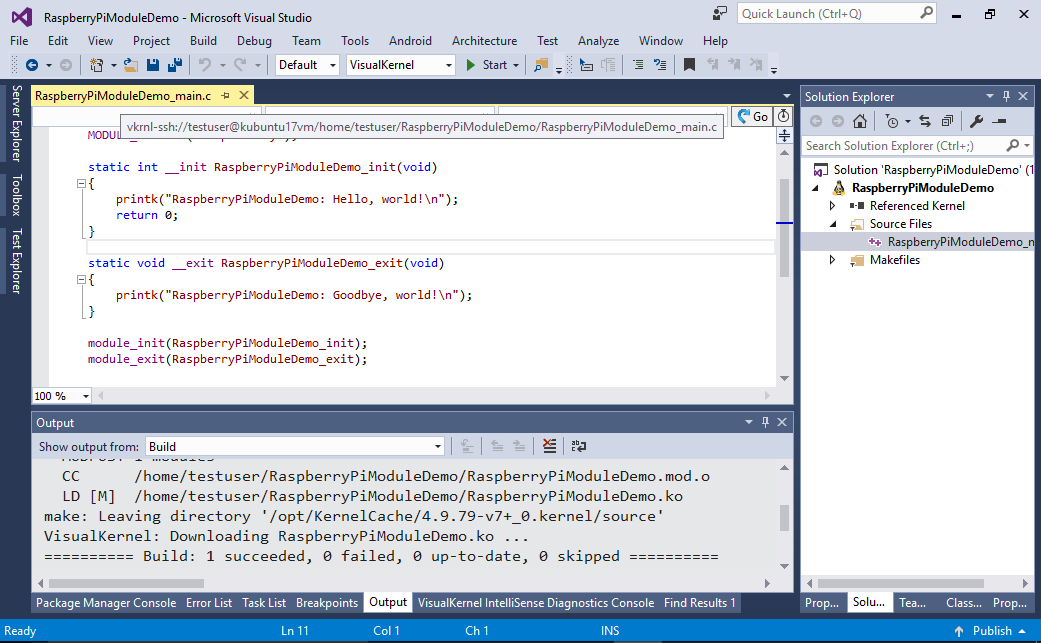
- Once the test succeeds, press “Finish” to create the project. Note how the full path of the source file starts with vkrnl-ssh:// indicating a file on a remote Linux machine that is directly accessed via SSH:
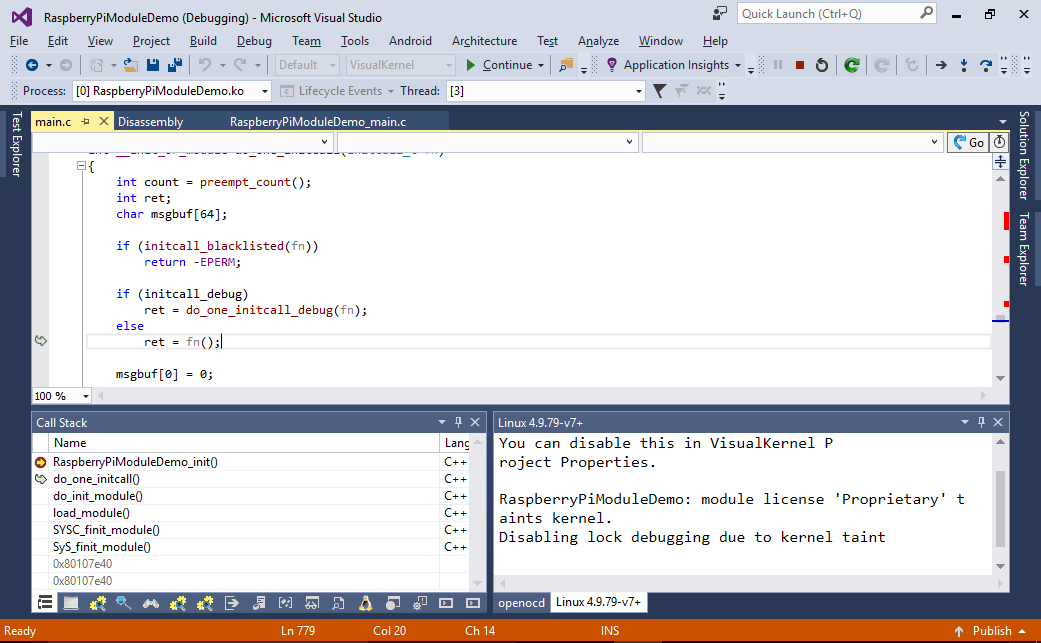
- Press Ctrl-Shift-B to build the project, set a breakpoint in the init function and start debugging by pressing F5. VisualKernel will load your module and the breakpoint will trigger:
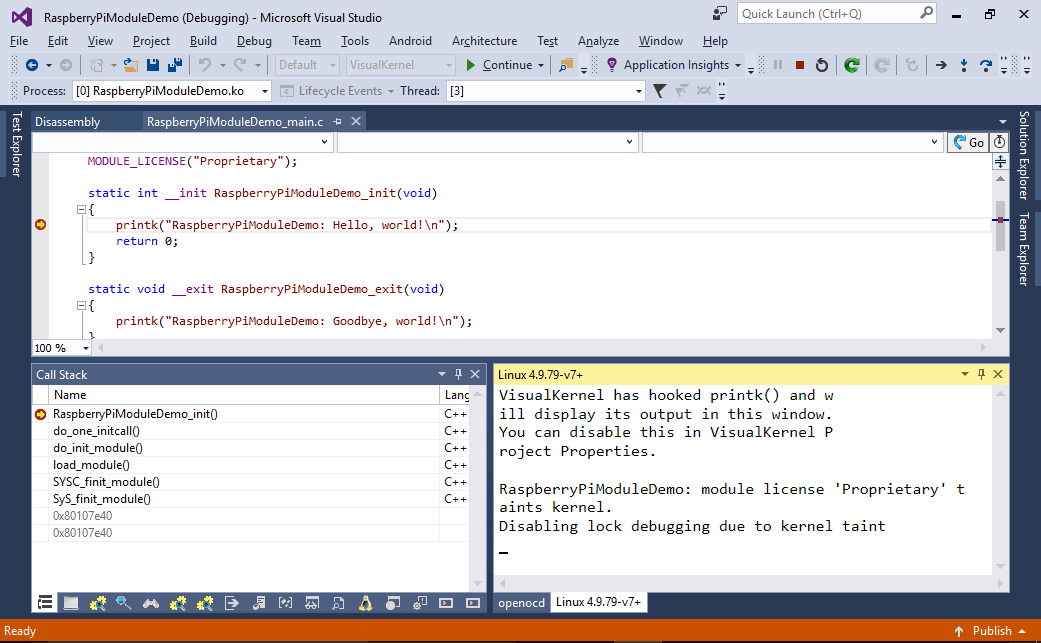
- Use the Call Stack to navigate to the relevant parts of the Linux kernel:
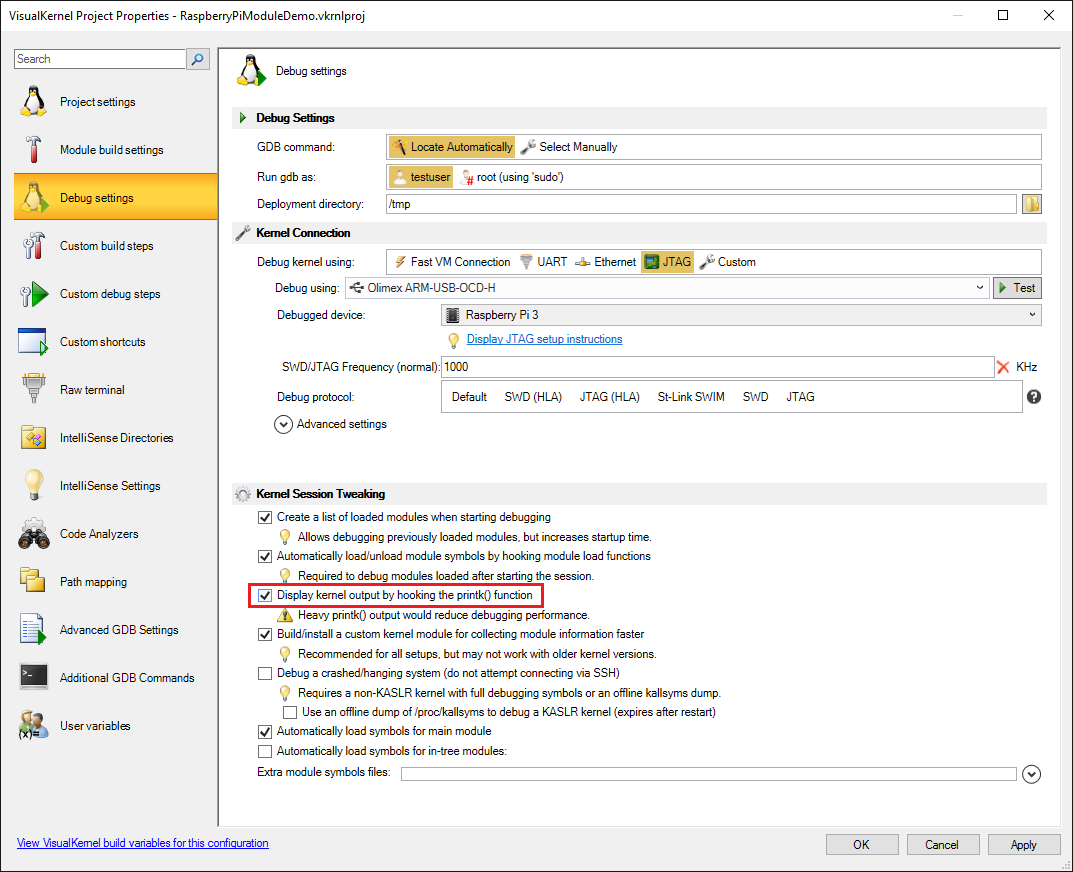
- Normally VisualKernel will hook the printk() function to display any kernel-mode output in Visual Studio. If your JTAG frequency is relatively low, this could noticeably slow down debugging. You can disable this option via VisualKernel Project Properties -> Debug Settings -> Display kernel output by hooking the printk() function:
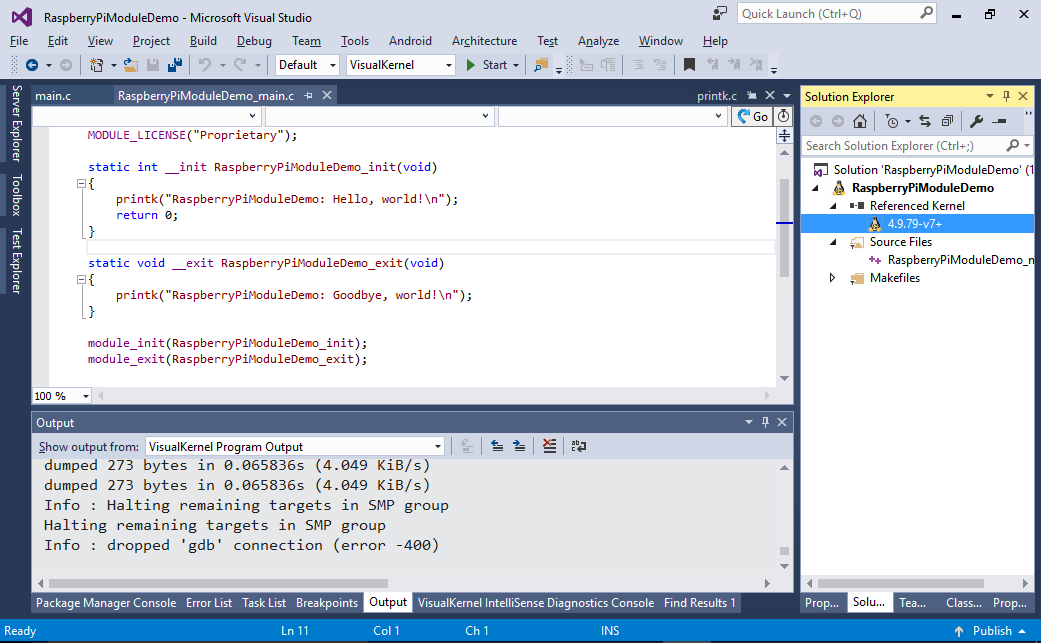
- If you are using the Advanced Kernel Project Subsystem, you can easily add the sources for the entire Raspberry Pi kernel to your solution. Simply locate it under the “Referenced Kernel” node in Solution Explorer and double-click on it to import it into the solution:
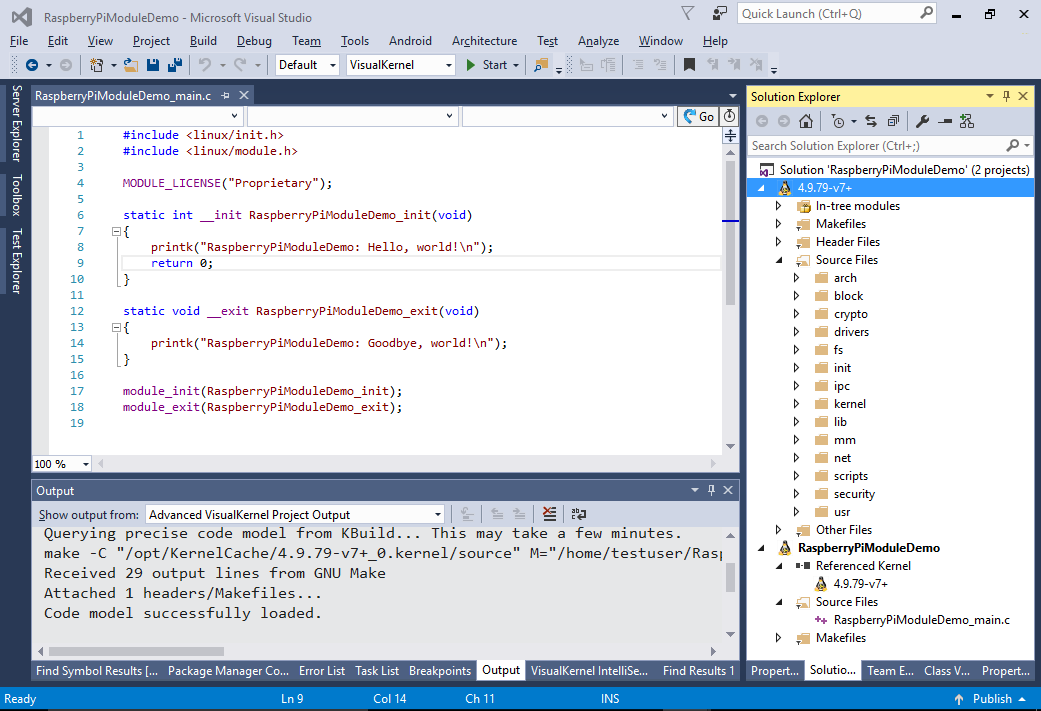
- VisualKernel will create a special kernel release project and add it to the solution:
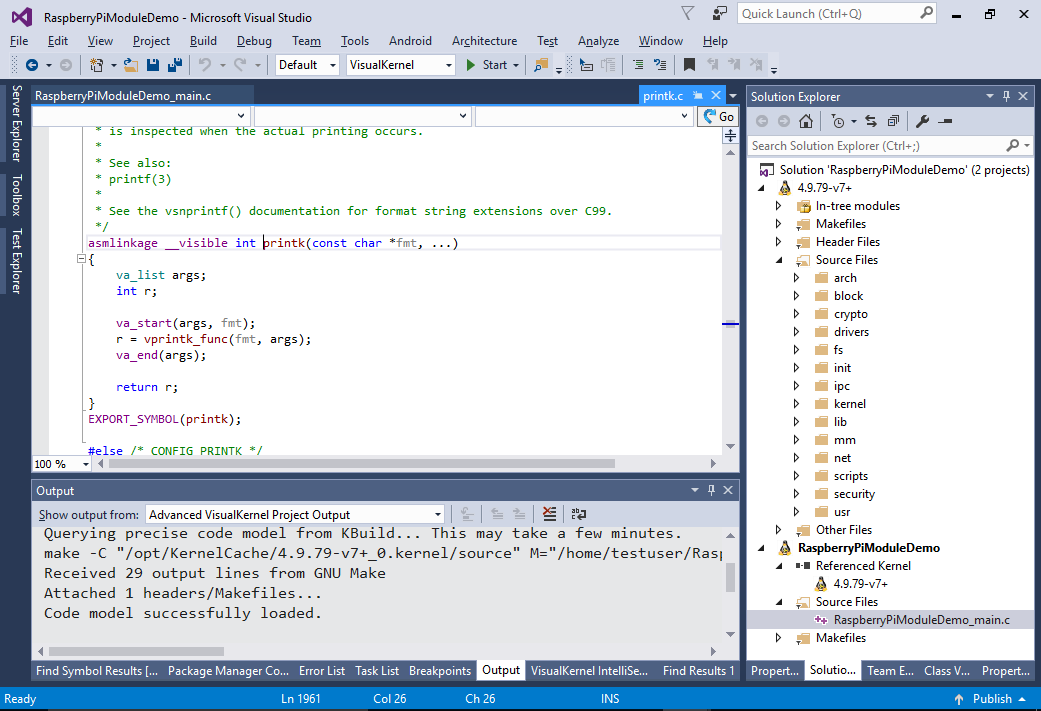
- Try it out by selecting the call to printf() and clicking “Go to definition”. VisualKernel will locate the source for the printk() function in the kernel package and will open it in Visual Studio:
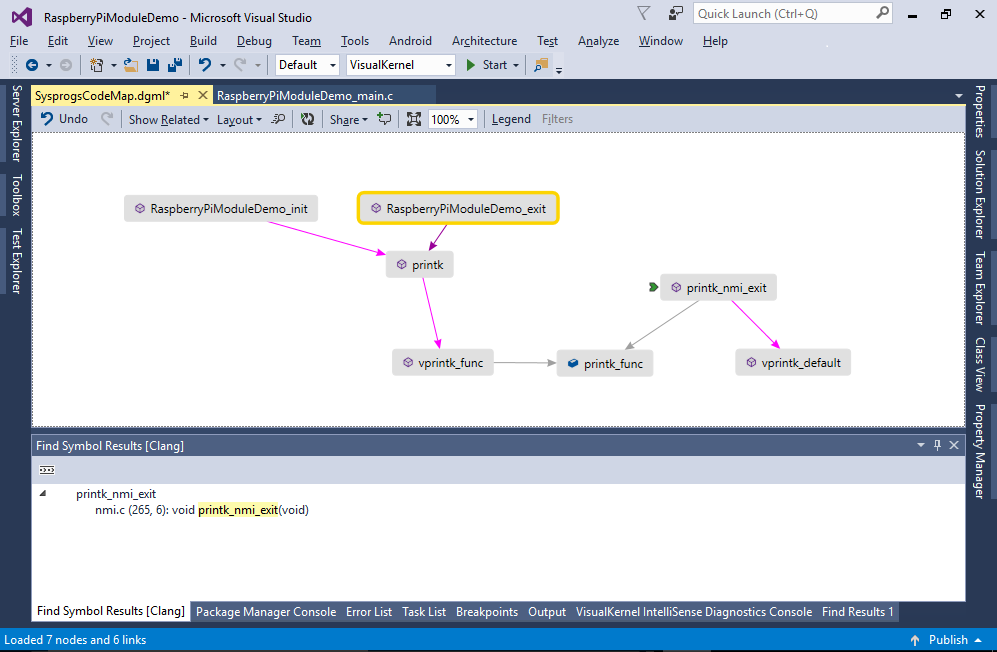
- You can also use the Code Map functionality to explore the relations between the functions. E.g. you can see how the printk() function uses the global printk_func variable that is set by printk_nmi_exit() to point to vprintk_default().